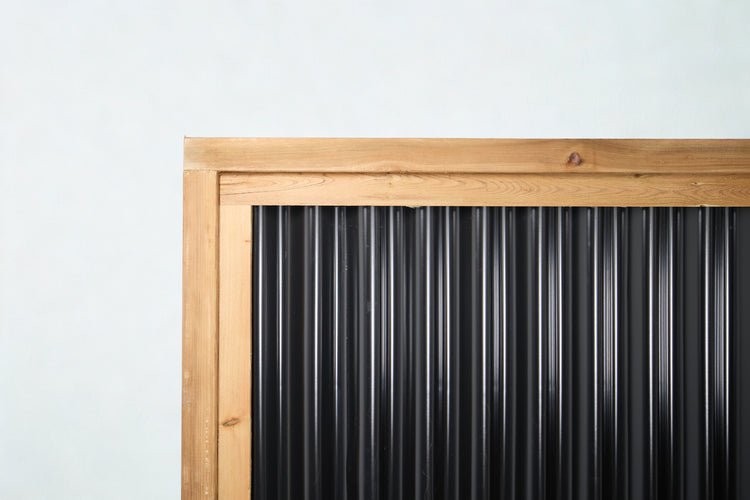
Fencing serves both practical and aesthetic purposes in landscaping and property management. Among various options, corrugated metal fencing has gained popularity due to its durability, low maintenance, and contemporary look. Whether you’re fencing in a garden, marking property lines, or adding a modern touch to your property, corrugated metal can be a great choice. This guide will walk you through the entire process of building a corrugated metal fence, from planning and materials to installation and maintenance.
1. Planning Your Fence
1.1 Define the Purpose
- Security: A corrugated metal fence can offer robust security.
- Privacy: Solid corrugated panels provide excellent privacy.
- Aesthetic Appeal: Modern, industrial look suitable for contemporary designs.
1.2 Check Local Regulations
- Permits: Contact your local municipality to determine if you need a permit.
- Height Restrictions: Check for any height restrictions or zoning laws.
1.3 Measure and Design
- Layout: Use stakes and string to outline your fence line.
- Dimensions: Measure the length and height of your fence. Standard heights are typically 4 to 6 feet.
- Post Spacing: Generally, posts are spaced 6 to 8 feet apart. Adjust based on your fence height and corrugated panel length.
2. Gathering Materials
2.1 Corrugated Metal Panels
- Types: Panels come in different materials (steel, aluminum) and finishes (galvanized, painted).
- Size: Panels typically come in 3 to 4 feet wide and 8 to 10 feet long.
2.2 Fence Posts
- Material: Common choices include steel, aluminum, or treated wood.
- Size: Choose posts that match the height of your fence and are sturdy enough for support.
2.3 Post Bases
- Concrete: For setting posts into the ground.
- Metal Post Anchors: For securing posts on concrete or other hard surfaces.
2.4 Fasteners and Hardware
- Screws: Use corrosion-resistant screws or bolts.
- Clips and Brackets: For attaching panels to posts.
2.5 Tools
- Drill: For pilot holes and attaching panels.
- Level: Ensures your posts and panels are straight.
- Saw: If cutting panels or posts is necessary.
- Post Hole Digger or Auger: For digging post holes.
3. Installation Process
3.1 Prepare the Site
- Clear the Area: Remove any vegetation or debris where the fence will go.
- Mark Post Locations: Place stakes where posts will go, ensuring they are evenly spaced.
3.2 Install the Posts
- Dig Post Holes: Dig holes about 1/3 of the post’s length deep.
- Set the Posts: Place posts in the holes, ensuring they are plumb (vertical) using a level.
- Secure the Posts: Fill holes with concrete or gravel and allow it to set. Concrete typically takes 24 to 48 hours to cure.
3.3 Attach the Corrugated Panels
- Align Panels: Start at one end of the fence line and align the first panel with the post.
- Fasten Panels: Use screws or bolts to attach the panels to the posts. Ensure screws are evenly spaced and driven into the corrugated ridges to avoid damaging the metal.
- Overlap Panels: If necessary, overlap panels slightly to prevent gaps and maintain privacy.
3.4 Install Top and Bottom Rails (Optional)
- Rails: Adding horizontal rails at the top and bottom of the fence can provide additional stability and a finished look.
- Attach Rails: Use brackets or screws to secure the rails to the posts.
4. Maintenance Tips
4.1 Regular Inspection
- Check for Rust: Inspect metal panels and posts regularly for signs of rust or corrosion.
- Tighten Fasteners: Ensure screws and bolts are secure and replace any that are missing or damaged.
4.2 Cleaning
- Wash Panels: Clean the corrugated panels with mild soap and water to remove dirt and debris.
- Avoid Abrasives: Use soft brushes or cloths to avoid scratching the surface.
4.3 Repairs
- Rust Treatment: Treat any rust spots with a rust-inhibiting primer and repaint if necessary.
- Replace Damaged Panels: If a panel is severely damaged, replace it with a new one to maintain the integrity and appearance of the fence.
5. Enhancements and Customizations
5.1 Add Landscaping
- Plants: Integrate plants, such as vines or shrubs, to soften the appearance of the metal.
- Decorative Elements: Consider adding decorative elements or lighting for additional flair.
5.2 Paint or Finish
- Color Options: Corrugated metal can be painted to match your home or landscape design.
- Protective Coatings: Use weather-resistant coatings to extend the life of the paint and protect against the elements.
Conclusion
Building a corrugated metal fence involves thoughtful planning, precise installation, and regular maintenance. By following these steps, you can create a durable, modern, and visually appealing fence that enhances both the security and aesthetic appeal of your property. Remember to consider your local regulations and property needs, choose high-quality materials, and maintain your fence properly to ensure it stands the test of time. With the right approach, your corrugated metal fence can be a standout feature that adds value and style to your home.


